Friday, June 12, 2026

REFRACTIVE INDEX OF GLASS PRISM measure with Glass Prism for std 11 & 12 GBSE

Refractive index of  Glass Prism


REFRACTIVE INDEX OF GLASS PRISM 

12.2  AIM :-
Using pins with a given prism determine the angles of deviation for six different values of angle of incidence. Draw the graph of angle of deviation versus angle of incidence. Determine, from this the angle of minimum deviation and using following formula determine refractive index of material of the prism.
Formula for Refractive index of Glass Prism


Angle of prism, A = ……. .

APPARATUS:  Glass Prism, Drawing paper, Drawing board, Pencil, Ruler, Pin, Protector,

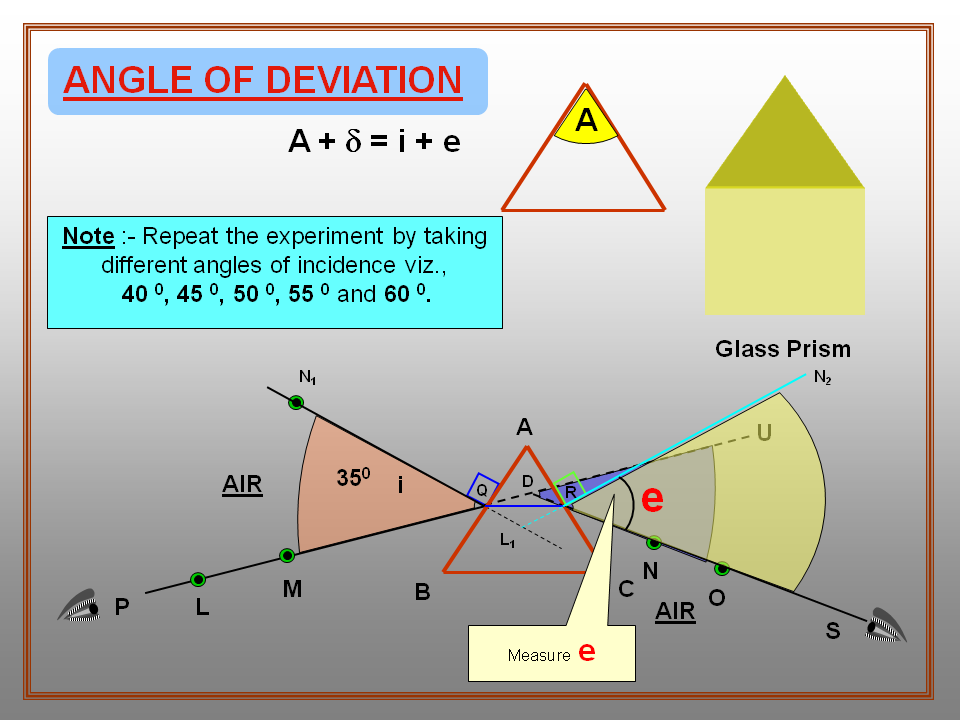
FORMULA : - A + d = i + e

PROCEDURE :-
Take paper and pin it on Drawing board. 
Now take Glass prism and put it on center of Drawing board paper.
Mark the edges of the prism with pencil
Refractive index of  Glass Prism procedure
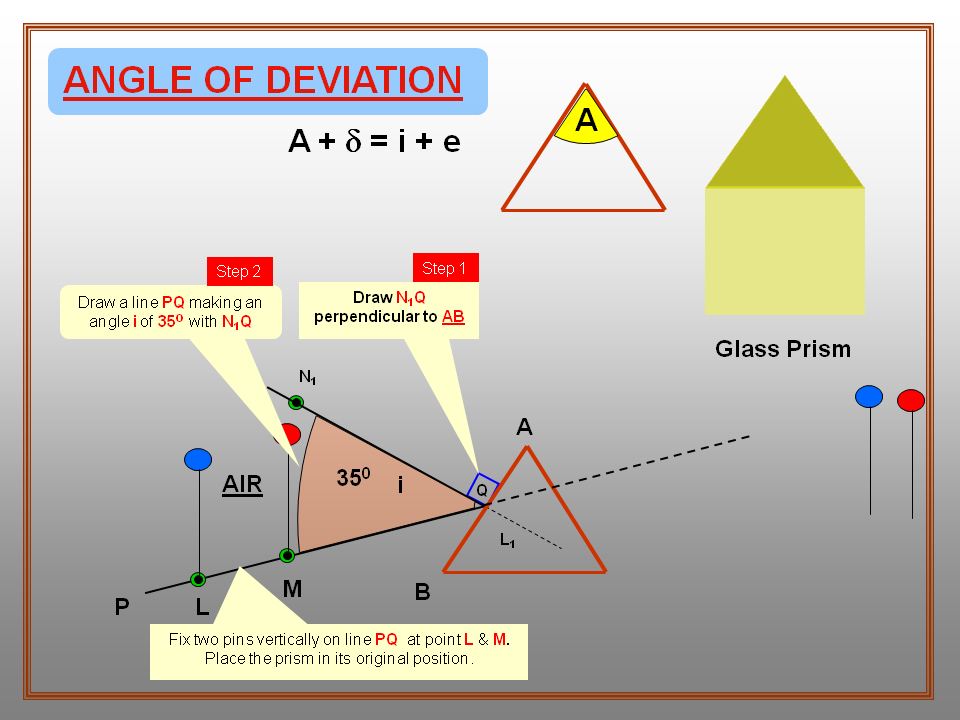
Draw N1Q perpendicular to AB
Draw a line PQ making an angle i of 35O with N1Q
NOTE :- Pins should be 3 – 4 cm. away from each other.
Fix two pins vertically on line PQ  at point L & M.
Refractive index of  Glass Prism procedure
Place the prism in its original position.
Refraction takes place QR after placing prism on its original place
Now look from surface AC, adjust pin N & O vertically on the side which you are looking so that the images of the pins L & M and the pin N & O appear to be in the same straight line.
Refractive index of  Glass Prism procedure
Draw a line  SR
Measure d = Ð UDN
Refractive index of  Glass Prism procedure
Draw a line SR, and draw a perpendicular N2R at R to the line AC
Measure  e (Angle of Deviation)
Refractive index of  Glass Prism procedure
Note :- Repeat the experiment by taking different angles of incidence viz.,
 40 0, 45 0, 50 0, 55 0 and 60 0.

For more details View Video

Angle of Deviation.

Thursday, June 11, 2026

Physical and chemical properties of acetic acid. Science GSEB std 8 to 12.

Acetic acid Physical and Chemical properties
AIM : To study the physical and chemical properties of acetic  acid.
THEORY :  Acetic acid in an organic acid. It contains carboxylic acid group – COOH. Its chemical reactions are the characteristics of COOH group.
APPARATUS  :  Three to four test tubes, test tube stand. Acetic Acid, Organic acid, Carbozylic acid, Zinc metal, Vinegar, Sodium Bicarbonate solution, Blue Litmus Paper,
CHEMICALS    :  Acetic acid, Zinc metal sodium bicarbonate solution and red blue litmus papers.
Acetic acid Properties
Acetic acid Properties procedure
Acetic acid Properties practical 

Conclusion :
Uses :  4-6 % solution of acetic acid is called vinegar. It is used for making the food tasty and sour and also used as food preservative.

Micrometer, its construction, reading ITI fitter, and science 11 & 12 students

Micrometer Screw gauge


Micrometer Screw gauge. 

Introduction 
Micrometer screw gauge is a form of calipers used for measuring small dimensions. Screw gauge in extensively used in the engineering field for obtaining precision measurements. The article describes the principle and main parts of a basic micrometer screw gauge.
Micrometer screw gauge (or micrometer caliper) is an instrument or device for measuring the length of an object which is more precise than a ruler and vernier caliper. It because a micrometer screw gauge has the smallest scale of 0.01 mm. The device is widely used in mechanical engineering for measuring small diameter, thickness, or angles to a high degree of accuracy.
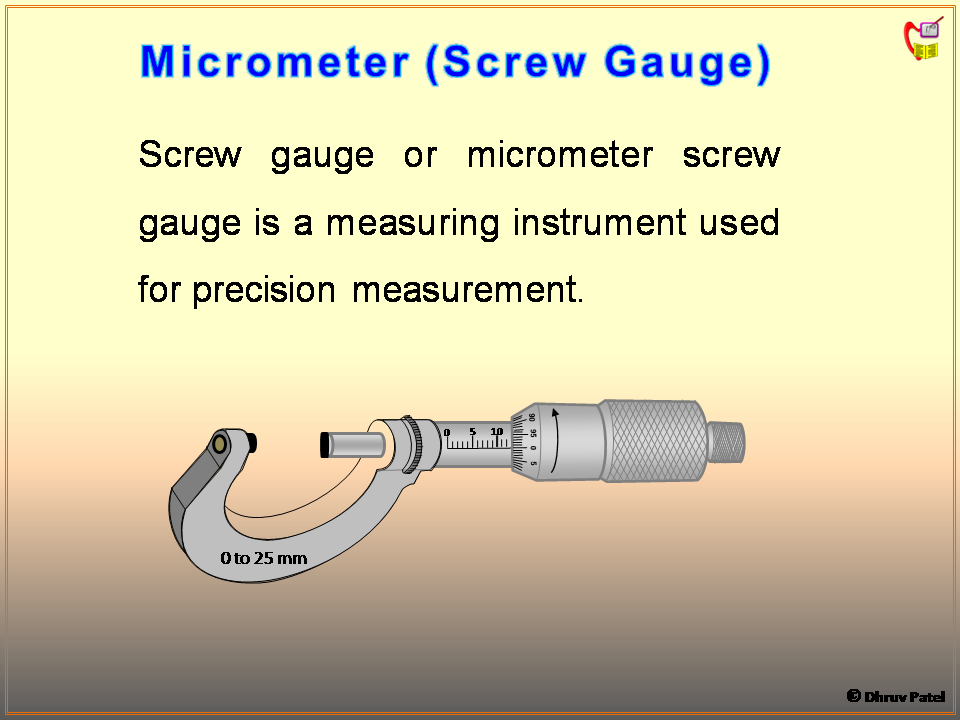
Screw gauge or micrometer screw gauge is a measuring instrument used for precision measurement. 
Micrometer Screw Gauge
Frame of Micrometer screw gauge
Anvil 
Spindle
Measuring faces
Main scale, Barrel or Sleeve
Thimble, Micrometer Scale
Ratchet stop
Spindle lock nut
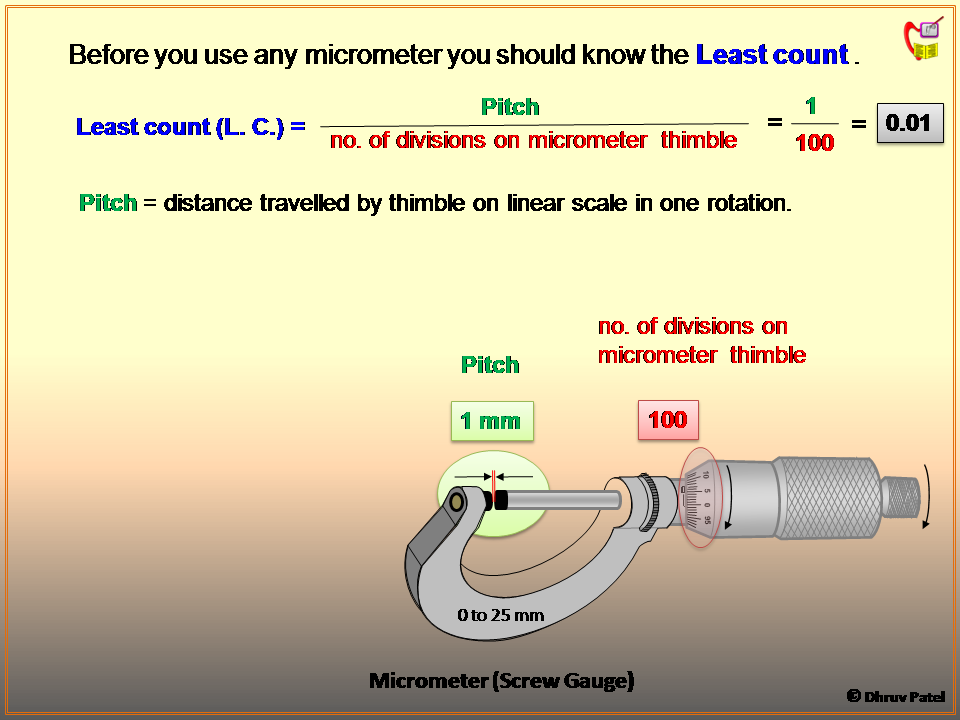
Least count of Micrometer
Thimble one round.
1 mm displacement micrometer
Discount calculation
Micromete screw gauge
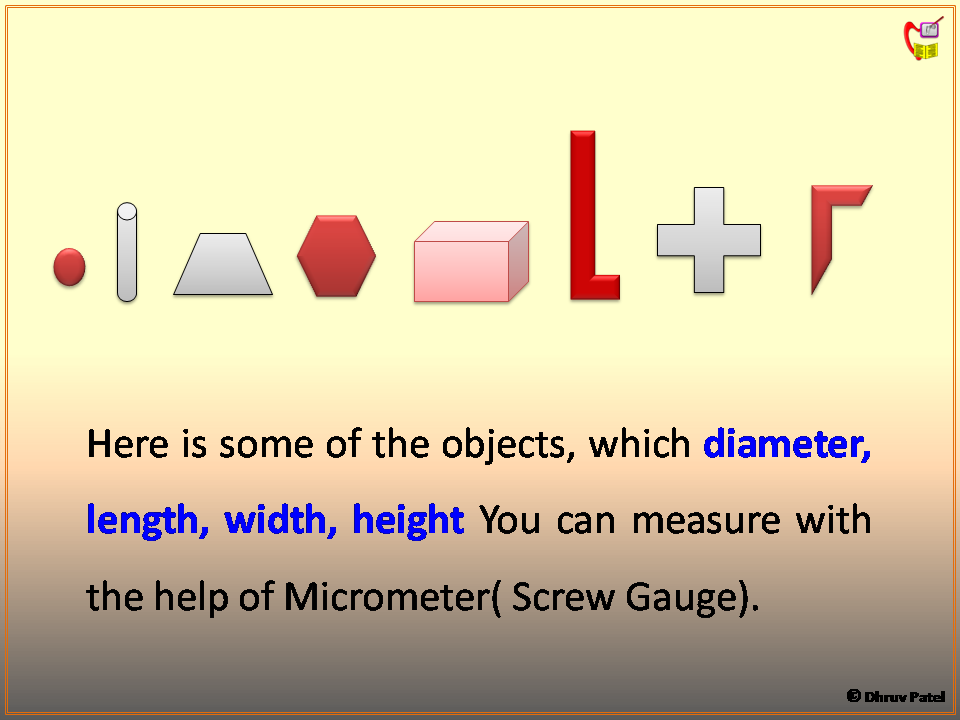
Objects measurement with Micrometer
Measuring of object with micrometer screw gauge
A screw gauge consists of a “U” shaped metallic structure, which is attached to a hollow cylindrical tube on one end. The hollow tube has a uniformly threaded nut inside it. A long stud with a plane face is fitted into this nut. Exactly on the opposite side of this nut and on the other end of the U shaped frame, a smaller stud with a plane face is also attached. Faces of both the studs are exactly parallel to each other.

This U shaped metallic structure is known as the frame of the micrometer screw gauge. the smaller stud is known as the anvil and the longer one is known as the spindle. the anvil is the fixed part of the device, whereas the spindle moves as and when the head is moved. the frame carries both the anvil and barrel, and is also heavier than the rest of the parts. The object to be measured is held between the anvil and the spindle.

The Barrel or sleeve is connects the frame to the cylindrical tube. It is a non-movable part of the screw gauge and has a scale inscribed over it which is the main scale of the device. Moreover, it also carries the most important part of the micrometer the screw.

The screw is the heart of the micrometer and is located inside the barrel. The screw converts small dimensions into measurable distance using a scale. The thimble or head is the end of the cylindrical tube and is turned to move and adjust the spindle. The thimble carries the vernier or secondary scale. There is one more part called the ratchet which is provided at the end of the tube. The ratchet is kind of limiting device which applies a pressure by slipping at a predetermined torque and thus prevents the spindle from moving further. Some screw gauges also consist of locking devices which holds the scales at a particular position for prevent any kind of error while taking readings.

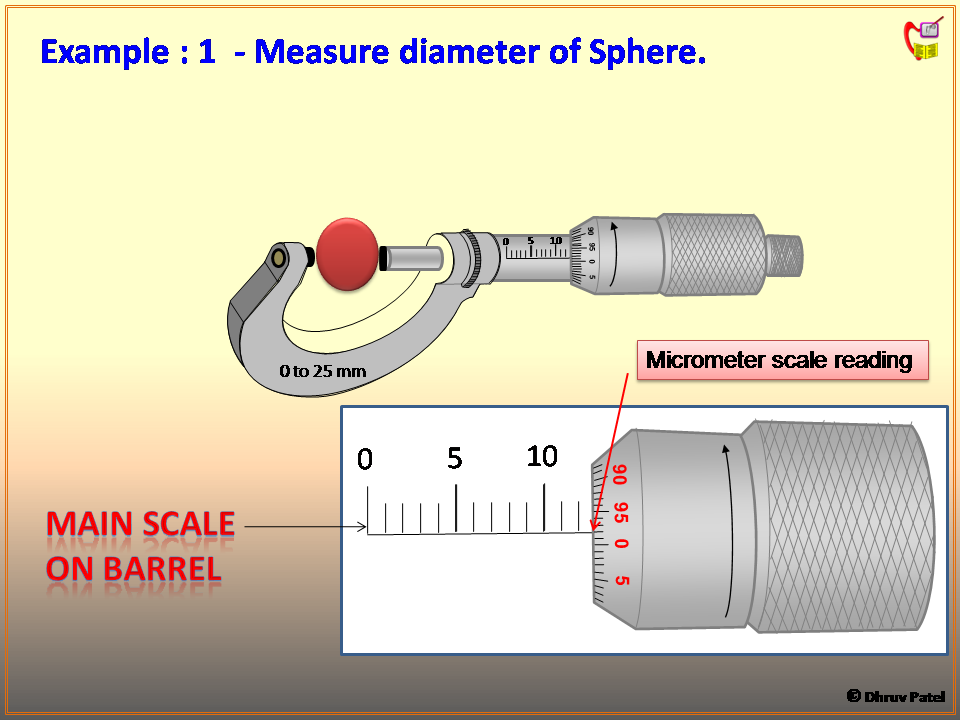
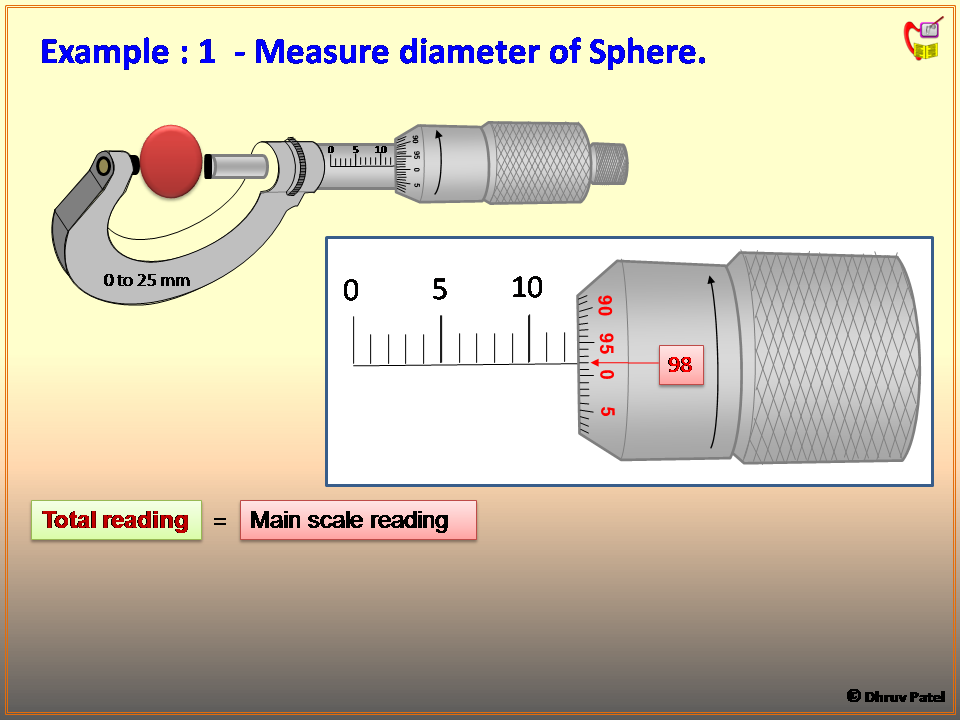
A micrometer screw gauge also uses two scales –main and secondary scales. The secondary scale is provided on the thimble and is the measurement of the pitch of the screw. This means that the reading on the secondary scale measures the distance moved by the thimble per rotation. The scale on thimble is divided into 100 equal parts and measures hundredths of a millimeter. The thimble scale rotates over the spindle or the main scale. The main scale is a millimeter scale subdivided into equal parts with half a millimeter distance. When the object is to be measured, it is placed in between the anvil and the spindle. Readings from both the scales are taken into account for arriving at the final measurement.

Micrometer screw gauge is a delicate device and thus special care should be taken while handling it. Moreover, it is also important that the micrometer is well calibrated to prevent any kind of error in the final reading.

Precaution Steps
The spindle and anvil are cleaned with a tissue or cloth, so that any dirt present will not be measured.

Watch video to Learn reading of
Micrometer screw gauge reading without the help of tutor. It is very easy to understand.
Micrometer screw gauge: